How to Build a Deck From Scratch

Durability: Concrete footings poured below frost line, rot-resistant materials, and precise joist spacing help prevent rotting. Style: Hidden fasteners, matching decking and railing colors, and a properly attached ledger board complement your home.

Deck

Value: A well-built deck raises resale value by up to 75%. It also reduces maintenance costs and protects against weathering. Contact Deck Builders Lexington KY for professional help.

Foundation: The key to a solid deck is a strong foundation, and digging several feet below-grade is usually required. Piers—usually concrete blocks—are set into the ground to support the framing of the deck. They may be set on grade, or they may rest on a footing below-grade that’s poured in place. For the latter method, it’s crucial to get a permit and follow local codes to ensure that the piers are built correctly.

Joists and beams: These hefty framing members (usually 4x or 6x stock) are installed horizontally to support the deck framing. They are attached to the posts with joist hangers or, in some cases, they are pinned to the ledger board with metal joist bolts. Joists are spaced every 12 or 16 inches, and rim joists are added to the outer perimeter of the deck to help with stability.

Custom lighting: Adding lighting to the deck increases safety and adds ambiance. Outdoor kitchen: Including a designated area with countertops for cooking and food preparation can make your deck a favorite spot for entertaining. Water features: Adding water elements like fountains or waterfalls can add a relaxing, tranquil ambiance. Wind exposure: Considering prevailing winds helps you position deck features to shield furniture and other materials from damage during strong weather. Drainage: Efficient drainage systems and slopes are essential to prevent pooling and potential water damage. Freeze-thaw cycle: Designing a deck that can withstand seasonal temperature fluctuations is critical for longevity.

Materials

Building a deck requires a variety of materials. Traditional wood options like cedar and redwood are rot and insect resistant but require regular upkeep for beauty and durability. More economical choices include pressure-treated lumber and a newer generation of preservatives that are more environmentally friendly and have lower arsenic levels than the older CCA preservatives used in the past.

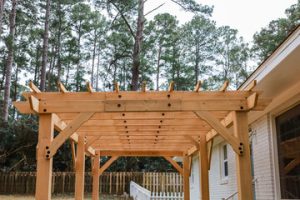
Raised decks typically require footings and posts that are anchored in concrete to ensure stability. In addition, the contractor may need to install proper joist spacing and construction techniques for the substructure of the deck. It’s important to use quality wood, and be sure to anchor the footings in concrete deep enough for the climate you live in.

Composite decking is a modern option for a low-maintenance, durable deck. While it isn’t as durable as a hardwood deck, it performs well and does not require staining or sealing. A professional deck builder will use high-quality power tools and specialized jigs designed to work with composite materials without chipping or splitting.

Deck lighting is an easy way to make your deck a gathering place for family and friends. Add a built-in bar to facilitate serving drinks and food and a dedicated space for games like cornhole or cards to transform your deck into the ultimate entertaining spot. Then, complete the outdoor deck by adding a sound system and music to enhance the entertainment experience and create an inviting atmosphere for guests.

Framing

During the framing phase, a professional deck builder brings the initial design to life, providing structural integrity and code compliance as well as thoughtful utility placement. This ensures that the deck can be modified to accommodate future additions and enhancements, allowing you to enjoy your investment for years to come.

The first step in preparing for the framing process is to determine the deck’s perimeter dimensions. This gives homeowners the lengths they’ll need for the ledger board (which attaches to the house) and the joists. Homeowners may choose to make their deck proportional to the house or use standard joist lengths for consistency and efficiency.

A joist is the horizontal beam that supports the deck’s boards. Most homeowners choose a 16-inch on center (OC) spacing, which means they’ll need to divide the deck’s width by 12 or 16 to know how many joists their project will require. This is done to account for the length the joists will span, including any overhangs and steps.

After nailing the ledger board, the joists are laid out. Start by taking a 2×8 and using a speed square to make a straight mark close to one end. Then, cut the 2×8 and nail it to the side of the perpendicular rim joist. Once all the joists are laid out, nail the outside face of the rim beam to the side of the ledger board. This will be the crow’s foot and create the outer edge of your deck.

The posts that support the deck are usually made from pressure-treated southern yellow pine, though 4×4 and 6×6 square posts are also available. The type and size of post depends on the deck’s load requirements, design, and location, as well as local building codes and soil conditions. Regardless of the type and size of post, homeowners should invest in high-quality fasteners to minimize future maintenance and repairs.

Layout

Once the foundation is in place, it’s time to lay out the principle structure of the deck. This will involve constructing a frame and laying down decking. A basic plan will outline the shape of the deck using stakes and string lines, with a measurement reference to indicate post placements. The number of posts will depend on the size of joists and the span rating. Joists should be placed spaced according to the plan and set in concrete footings that are at least four feet deep (and sometimes more, depending on your climate). Blocking may be added between joists for support.

The next step will be to install rim and ledger boards, which will serve as the base of the principal framing. The joists will be anchored to the ledger boards with metal joist hangers, and the other end will rest on one or more of the beams. The joists should be spaced at 12 or 16 inches. Parting boards, which run perpendicular to the decking, can be used to add visual appeal and eliminate the need for butting of boards when spanning long lengths.

Before installing the joists and beams, it’s important to review the local residential building codes to determine the lumber sizes needed for structural components, as well as decking boards. For example, a common measure for joists is 5/4-inch thickness, but the actual dimensions will vary depending on the way dimensional lumber is cut, dried and shaped.

It’s also a good idea to make a detailed site and framing plan before beginning the project. This will show the location of piers, posts and beams, as well as the dimensions of railings or other structures attached to the deck. This can save time and money, as you’ll be able to work around obstacles, like dryer vents, rather than moving them out of the way.

Assembly

Before beginning to build a deck, it’s important to consult the building codes in your area. Some cities have set-back requirements that determine how close to your property lines you can build a deck, while others may require certain heights or dimensions for railings and stairs. Some even require that you obtain a permit before beginning any work. You should also check with your local zoning board to learn whether your community has any restrictions on deck construction.

The first step in the deck construction process is to install the ledger board, which will support and anchor the side of your deck that attaches to your house. You’ll need to carefully mark the location for this board, which will be attached with screws or nails, and remove any siding that lies above it. You should also tuck flashing under this board to prevent water from getting behind the framing.

Once the ledger is in place, you’ll need to install footings and support beams. These are essentially concrete columns that will hold the rest of your deck frame. Make sure that your footings are at least four feet deep to ensure they’re below the winter frost line in your region.

When installing the joists that will form the framework on which surface decking will lie, it’s a good idea to use rim joist hangers, as these will help keep the joists in place without notching them. It’s also a good idea to disperse the end-joints as much as possible, which will help minimize structural deflection.

Once your joists are in place, you can install the decking. You should be sure to keep the boards cool before fastening them, and use top-down or hidden clip fasteners to avoid gapping.

Cabinet Refinishing – A Cost-Effective Alternative to Cabinet Replacement

Cabinet Refinishing San Jose CA is an affordable, less invasive alternative to replacing your existing cabinets. Refinishing can be completed in a few days with minimal disruption to your kitchen life.

Cabinet Refinishing

It also opens up a world of customization options that can help you achieve your dream kitchen. However, be aware that colors and finishes can look different in natural and artificial lighting.

Cabinet refinishing offers a cost-effective way to revitalize your kitchen without the massive price tag that comes with full replacements. The process involves stripping existing finishes and re-painting or staining your cabinets. It’s a simple yet effective solution that can cut your renovation costs by up to 50%.

It also eliminates the expense of replacing your hardware and allows you to keep any other features you like about your kitchen, including appliances. It’s the ideal choice for a quick visual update on a tight budget or when you need to boost your home’s value before selling it.

By choosing to refinish your cabinets instead of replacing them, you’re also making an environmentally conscious decision. Refinishing avoids the production, transport, and disposal of new materials that can cause environmental harm. Moreover, you’ll be helping to reduce waste and save on energy consumption by reusing the existing materials.

Professionals are trained to ensure precise workmanship, resulting in flawless coatings that will stand up to daily use and withstand the elements. This attention to detail minimizes the risk of damage and stains, ensuring that your cabinets look great for years to come. Professionals are also knowledgeable in color theory and can help you achieve a custom look that meets your design goals.

The refinishing process is also less labor intensive than replacement, as it involves stripping and repainting only the cabinet doors and drawer fronts. It can take weeks or months to complete a cabinet replacement project, which is often much more expensive than the cost of cabinet refinishing.

Refinishing is also a safer option for your health, as it minimizes dust and debris in your living space. The construction process involved with tearing out and installing new cabinets can generate significant amounts of airborne particles, which can cause irritation and allergies in your family members. On the other hand, refinishing your cabinets is a clean and safe procedure that will only affect the surfaces of your cabinet boxes.

The beauty of cabinet refinishing is its ability to preserve the aesthetic integrity of your home while improving its function. In a town like Ridgewood, where preservation and innovation go hand-in-hand, this solution is the perfect choice for homeowners who want to modernize their kitchens without breaking the bank.

Time-Saving

Cabinet refinishing is a time-efficient option compared to cabinet replacement. Rather than installing new cabinets, refinishing uses your existing cabinets and changes the color or finish. The process can take a few days to a couple of weeks depending on the scope of work and your kitchen’s layout. While it’s possible to refinish cabinets yourself, hiring professionals can help you save more time and achieve a more professional finish.

Before starting the project, you should clear out your cabinets and protect countertops and appliances with coverings. It’s also a good idea to prepare the workspace by opening windows and setting up exhaust fans to minimize fumes and dust particles. Using quality paints and stains can also make a significant difference in the durability of your cabinets. Choose high-gloss finishes that are easy to clean and will withstand wear and tear.

The refinishing process begins with assessing your cabinets’ condition and ensuring they are structurally sound. Once this step is complete, they’ll be cleaned to remove dirt and grease, sanded to create a smooth surface, and then primed. Once the primer is dry, your cabinets will be refinished with a new coat of paint or stain. This may include glazing, distressing, or other finishing techniques to enhance the look of your cabinets.

One of the most important considerations when choosing a color for your cabinets is whether or not it will coordinate with the rest of your living space. If you’re unsure, consult with an interior designer or test the color on a small area of your cabinets to ensure that it suits your design vision. It’s also a good idea for homeowners to know how to care for their cabinets and be aware of any maintenance requirements.

Refinishing your cabinets can be a great way to modernize your home’s aesthetic without breaking the bank. It’s a greener option than replacing your cabinets, which involves tearing out perfectly functional units that end up in landfills. Refinishing your cabinets can also save you money on materials and labor costs, making it an affordable choice for any homeowner looking to remodel their kitchen or bathroom.

Customizable

Cabinet refinishing offers a wide range of customization options, making it an ideal solution for homeowners seeking to update their kitchen design. From color to finish, professional painting contractors can transform your cabinets to align with current trends or reflect your personal style. With the right materials and industry-leading techniques, you can achieve a custom result that will elevate your kitchen’s ambiance for years to come.

Refinishing involves stripping your existing cabinet doors and drawer fronts, repairing damage, sanding the surfaces, and applying a new paint or stain to the surface. It’s an ideal option if you’re happy with your cabinet’s layout and configuration, and just want to change the look of your kitchen. It’s also significantly cheaper than refacing, and can be completed in less time.

If you’re interested in a more dramatic cabinet change, refacing is an alternative that replaces your existing doors and drawer fronts with new ones. You can choose to install custom-made door panels, or wood veneers that provide the appearance of natural wood. Cabinet refacing is a great option if you’re looking for a more modern look, or if you’re planning to sell your home soon.

Whether you’re refacing or refinishing your cabinets, it’s a good idea to apply a quality sealant afterward to protect the finish against moisture, dirt, and wear and tear. This will help extend the life of your newly refinished surfaces, keeping them looking brand-new for longer.

Refinishing your cabinets is an environmentally responsible option. It eliminates the need for wasteful disposal of your old materials, and reduces landfill waste. It also cuts down on energy costs by reducing your dependence on electricity and gas for cooking. To further enhance your environmental impact, consider replacing the hardware on your cabinets with eco-friendly options. You can swap out your knobs and pulls for antique brass, matte black, or polished nickel to create a completely different aesthetic with minimal cost. Alternatively, you can opt for a more subtle change by adding an accent color to your cabinet doors and drawers. N-Hance’s Color Shift process entails hand-applied coats of stain that darken your existing cabinet color, creating an updated shade while preserving the natural wood grain.

Durable

Cabinet refinishing allows you to change the color and finish of your cabinets without changing their structure, which makes it more durable than replacement. It’s ideal for older cabinets that are in good structural condition but have worn surfaces. Professionals apply multiple coats to achieve a thick and resilient finish that’s resistant to moisture, chipping, and cracking. The quality of the paint and stain used is also critical to durability. Experts choose top-tier products, such as KCMA tested coatings, that provide both style and performance, including moisture and stain resistance.

Refinishing is a greener alternative to cabinet replacement because it reduces waste and environmental impact. Purchasing new cabinets involves the cost of manufacturing, transportation, and disposal, while refinishing re-purposes existing materials. Moreover, professional refinishing companies utilize environmentally responsible products that are free from hazardous chemicals and VOCs.

The use of advanced spraying techniques minimizes brush marks and provides a smooth, factory-like finish that’s more durable than hand painting. Additionally, professionals use a variety of sealers that protect your cabinets from moisture and wear. They can even add anti-fingerprint coatings to prevent your cabinets from becoming dull over time.

Whether you want a modern or traditional look, refinishing is a great option for your kitchen. It can be an affordable and quick way to upgrade your cabinets and make them look brand-new. If you’re looking for a more dramatic transformation, however, refacing is the right choice for you.

Choosing between refacing and refinishing depends on the state of your cabinets, the desired aesthetic, and your timeline. Refacing is a more expensive and time-consuming option but will give your cabinets a brand-new appearance. Both options offer benefits, but refinishing may be a better option if you’re concerned about the longevity of your cabinets. It can last up to a decade with proper care and maintenance. Keep in mind that refinishing can be more labor intensive than refacing, and you’ll need to be patient while the work is being done. The key is to hire experienced and reliable contractors to ensure that your cabinets will be beautiful for years to come.

Corporate Training Services

Corsi Di Formazione Per Aziende help companies transform their employees to become more productive and innovative. These services include personalized coaching and interactive workshops that encourage growth and leadership development.

Corporate Training

A corporate training company should offer a variety of training programs that cater to different learning styles. They should also take into account the bandwidth and time commitments of participants.

Corporate training services can help your company develop a strong workforce by helping employees improve their skills and knowledge. Employees who are trained in new skills can adapt more quickly to changes in business processes and technologies, which is crucial for organizational resilience. These skills can also lead to increased productivity and better job performance. As a result, employees are more capable of meeting the needs of their customers and clients. Additionally, employees who are trained in new skills can develop a stronger sense of self-determination and confidence, which can boost morale and overall workplace satisfaction.

On-site training is a type of corporate training service that takes place in the workplace. It provides a number of benefits, including cost savings, greater availability and flexibility for participants, and the ability to customize the program to align with business objectives and equipment. It also allows participants to participate in training without sacrificing their work schedules or requiring them to pay for travel expenses.

Moreover, on-site training provides a more collaborative learning environment than virtual seminars because the trainer can see how participants are engaged during sessions. Moreover, the on-site training experience provides more opportunities for interaction and team building, which is important for creating a positive work culture. This is especially true if you choose an experienced training provider that is committed to helping your organization achieve its goals and aspirations.

Another benefit of on-site training is that it allows for more consistent messaging across teams. This is particularly important for introducing new processes and reinforcing organizational values. It also allows for more relevant examples and scenarios that are applicable to the specific context of your workplace. This helps to build a shared understanding among all members of the workforce and makes it easier to collaborate with one another.

Corporate training is essential for promoting innovation and creativity in your company. The best way to foster these traits is through targeted training that encourages critical thinking and unconventional approaches to problem-solving. This will prepare your staff members to handle a rapidly changing business environment and stay ahead of the competition.

Online

Online corporate training services are a convenient and cost-effective way for companies to provide employees with the skills they need to succeed. They can also help improve employee performance, engagement, and retention. This type of training can take place in a variety of formats, including live webcasts, interactive virtual classrooms, and self-paced online courses. It can also be delivered using mobile devices, making it easy for employees to access content from anywhere.

The corporate learning industry is growing rapidly, and experts expect to see significant increases in revenue over the next few years. This is largely due to the growth of e-learning and the rise of corporate training programs. It is also a result of the increased demand for quality training by businesses of all sizes. However, implementing and evaluating an effective training program can be challenging.

One of the keys to success is understanding the preferred learning styles of your team members. For example, some people learn best with hands-on activities, while others prefer more structured and collaborative environments. You should also consider the amount of time they can commit to participating in your training programs. Leadership buy-in and advocacy are essential for ensuring your team is fully engaged in the training process.

Corporate training is a crucial component of every company’s strategy. It ensures that your workforce has the knowledge and skills required to meet business goals and regulatory requirements. Moreover, it provides an opportunity to build employee morale and strengthen your brand image. In addition to these benefits, the training industry is expected to grow at a faster rate than other industries.

There are many different types of corporate training services available, and it’s important to choose the right ones for your organization. The best options will be based on your budget and needs, as well as the size of your workforce. Ideally, you should choose a service that is experienced in working with your specific industry.

A good corporate training service will include a variety of learning materials and engage your learners in a fun and exciting way. This can be done by using interactive videos, games, and simulations. It will also help you track and evaluate employee progress. This way, you can make sure that your team members are getting the most out of their training experience.

Blended

Blended learning has become a staple in many corporate training programs. This type of training offers a mix of face-to-face meetings with online resources to deliver a holistic learning experience. It is flexible, convenient, and customizable for different learners’ needs. It also provides valuable data-driven insights to enhance the learning experience and boost employee retention.

Unlike traditional classroom training, which can be time-consuming and costly, blended learning is more efficient and provides more return on investment. It eliminates travel, accommodation, and venue expenses while allowing employees to learn at their own pace. In addition, it promotes collaboration and peer-to-peer learning through interactive elements.

As a result, it is more effective and engaging than traditional classroom-based training. However, it is important to keep in mind that blended learning is not just about combining online and face-to-face elements, but rather about maximizing the benefits of each. To do this, the instructional design approach should be focused on learning goals and objectives and should utilize multimedia to increase engagement and retention.

Online training can be a powerful tool to complement traditional classroom sessions, and it is often used to train new hires or refresh existing knowledge. It allows employees to take courses at their own pace and re-visit content as needed. This flexibility also allows them to fit training into their schedules and other personal commitments.

Another advantage of blended learning is that it can improve learner engagement by incorporating interactive content and self-paced modules that allow users to interact with course materials at their own pace. This can help them master the material faster and more effectively, resulting in increased productivity and job performance.

Blended learning is becoming increasingly popular in the workplace, as it offers a number of benefits for both instructors and learners. Online components of a blended training program provide real-time feedback and assessments, which can be utilized to identify gaps in knowledge and target areas for improvement. This can save time in the classroom and allow trainers to focus on more complex areas of the curriculum. It also enables learners to re-visit microlearning lesson videos and online assessments as needed, ensuring that they have an optimal learning experience.

Certification

Whether you’re looking to ensure regulatory compliance, meet performance goals or drive key business initiatives, high-impact corporate training delivers results. It also equips employees with the skills and knowledge to thrive in their role, helping them grow professionally while improving your organization’s overall success.

To maximize the benefits of your company’s corporate training programs, you need to first understand your employees’ preferred learning styles. For example, some learners prefer interactive, hands-on training while others thrive in self-paced online learning. Similarly, younger employees may require a more flexible schedule than older ones. You should also consider the level of expertise and experience of your trainers. Choose a provider with a proven track record of developing and delivering effective training.

Many professional development companies offer certified corporate training. These courses can be taken on-site or online and are often delivered by certified training professionals. These instructors and consultants can help you select the best training programs to suit your company’s needs. They can also assist you in designing training programs and establishing a culture of continuous learning.

Corporate training is an essential part of any business’s employee development strategy. It helps improve decision-making, builds leadership skills, and fosters innovation. In addition, it allows your employees to stay up-to-date with the latest technology, ensuring that they are equipped to perform their jobs effectively.

Aside from its obvious business benefits, corporate training also has a positive effect on employee retention rates. In fact, companies that provide a strong learning culture have 53% lower attrition rates than those that do not. Furthermore, it has a direct impact on revenue and profits as a result of better productivity.

Choosing the right training solution is essential to your business. It’s important to evaluate the hard and soft skills of your employees and identify any gaps that need to be addressed. It’s also crucial to select a trainer that has a good understanding of your industry and can convey the information in an engaging way. Moreover, you should also take the time to understand your business’s unique needs and objectives.

Natalie Wood – Movie Star Who Challenged Hollywood Bosses

Natalie Wood was a movie star who didn’t let Hollywood bosses determine her career. She had the moxie to challenge Jack Warner and choose roles she wanted to make, including West Side Story.

Natalie Wood

The documentary interviews her daughter, Natasha Gregson Wagner, as well as friends and family (including Mia Farrow and Elliott Gould). But it focuses on the inescapable subject of her drowning on a weekend boat trip with husband Robert Wagner and co-star Christopher Walken in 1981.

A delightfully charming movie about a department store Santa Claus, Miracle on 34th Street became a beloved Christmas classic. Its star, Natalie Wood, was nominated for an Oscar and won a Golden Globe. The film also featured a fine supporting cast that included Elizabeth Perkins, Dylan McDermott, and Mara Wilson. This was the first time that Wood had a leading role as opposed to a supporting one, and her performance was lauded.

The actress was only 24 at the time of its release, and she had already established herself as a major star. However, she was a victim of tabloids in her personal life as well as the public’s distorted interest in her career. She reportedly struggled to maintain her privacy after the success of this film and found it difficult to cope with the constant intrusions on her family life and work.

This was one of the last films that Natalie Wood starred in before her death. After this, she took a hiatus from acting and only briefly returned to the screen in the ensemble disaster film Meteor (1979) with Sean Connery and the sex comedy The Last Married Couple in America (1980). The latter was a controversial and groundbreaking role for the actress, who used the word “fuck” during a frank discussion with her husband George Segal.

Even though Miracle on 34th Street is a Christmas classic, it was actually released in the summer of 1947. Early promotional materials emphasized the smiling faces of Wood and co-star John Payne, with nary a snowflake in sight. Edmund Gwenn, who played Kris Kringle, was relegated to the background. It wasn’t until the film was released that audiences learned about his amazing performance in this classic movie.

Rebel Without a Cause

Daring for its era, Rebel Without a Cause showed 1950s viewers that nice middle-class suburban kids could go wrong too. In the film, Jim Stark (James Dean) arrives at a new high school with his family and soon befriends sensitive misfits Plato (Sal Mineo) from a troubled home and Judy (Natalie Wood), who leads a gang-like clique of rebels. Eventually, she and Jim get involved in a dangerous nocturnal drag-race duel in stolen cars that ends with tragic consequences.

The film also sparked outrage and even threats of censorship for its exploration of teenage sexuality. While today it may seem dated in its depiction of teenage rebellion, it is still a compelling story that benefits from a strong cast. Dean and Wood are both excellent in their performances, with the latter displaying an astonishing emotional range that makes her performance even more powerful. Mineo is equally impressive, crafting a character who is both overwrought and touching.

Adding to the value of this 4K release is a terrific audio mix that emphasizes the movie’s dramatic score and allows its acoustic elements to come through clearly. The transfer is sharp and detailed, with rich colors and strong contrast.

Extras include an in-depth commentary by screenwriter Stewart Stern and a documentary called Defiant Innocents that discusses how the film developed. The featurette also features interviews with Natalie Wood and James Dean. Hopper is an engaging interviewee, and while his stories about his relationship with Dean can be a bit salacious, it is clear that he had enormous respect for his costar. A handful of deleted scenes with sound, black-and-white wardrobe tests and some fairly staged behind-the-scenes footage round out this fine release.

Splendor in the Grass

This 1961 melodrama about a small-town girl’s love for her high school football star seems very much of its time. Both the 1920s setting and the film’s Actors Studio production make clear its roots. But despite its age, it has become timeless because of its central performances and nuanced script. The story of Wilma Dean “Deanie” Loomis’ obsession with Bud Stamper (Warren Beatty) shows that even wholesome people can be driven to emotional instability, if not outright madness. In the end, a love affair that was forbidden by class and social mores drives Deanie to a suicide attempt that is both shocking and poignant.

It would be easy to argue that Splendor in the Grass is a cautionary tale of the dangers of loose morals and sexual freedom, but that is too simplistic. Instead, the movie illustrates how insidious and intangible forces can be, weighing down young minds with the weight of social expectation. The film also makes it clear that the most damaging blow to a youth’s self-esteem is not a physical assault but the rejection of their innermost desires.

Wood’s performance is nothing short of astounding, and she carries off both fits of hysteria and the agonizing breakdown with grace and strength. She is aided by her co-stars, especially Beatty who makes his big-screen debut as Bud. Both he and Wood are backed by solid supporting performances from Audrey Christie (Deanie’s mother) and Pat Hingle (Bud’s father).

The film’s final scene is perhaps the most iconic of its kind in cinema history. It echoes William Wordsworth’s phrase, “Poetry is the spontaneous overflow of powerful feelings.” Ultimately, though, it is Wood’s beauty and radiance that give the movie its transcendent sense of purity and strength.

West Side Story

After a decade of success as the daughter in family films, including Fred MacMurray’s daughters in Father Was a Fullback and Dear Brat, Wood moved to adult roles. Her role as Maria in Jerome Robbins’ and Robert Wise’s 1961 West Side Story, a modern allegory of Romeo and Juliet set among youth gangs and juvenile delinquency, was both a critical and box-office triumph.

Unlike her other roles, Wood sang and danced in West Side Story. However, her singing voice was dubbed by Marni Nixon, who had also dubbed Deborah Kerr’s singing voice in The King and I. Wood only learned of her dubbed performance on the final day of production, and was devastated.

Although she had a successful career, it was during this period that Wood’s private life began to crumble. She married actor Robert Wagner in 1957, a union that her mother vehemently opposed. They separated after two years and divorced in 1962. In 1969, she married British producer Richard Gregson, with whom she had a daughter, Natasha. Despite their rocky relationship, Wood and her daughter were the focus of media attention for their apparent closeness.

For her role in West Side Story, Wood earned an Oscar nomination. Her subsequent career hiatus included appearances in the ensemble disaster film Meteor (1979) with Sean Connery and a sex comedy called The Last Married Couple in America (1980). Her work in these films broke ground for an actress with a clean, middle-class image; she used the word “fuck” during a frank marital discussion with her husband (Segal). The film also marks her first starring turn as an older woman, a milestone that would become a trademark of her later work.

Gypsy

Naomi Watts can usually be counted on for a level of acting that’s at once both believable and affecting, but her talents were wasted on the clumsy scripts in this Netflix series about a Manhattan therapist with a taste for stalking. The show’s premise promises plenty of taboo drama and no shortage of conflict, but it never rises above the merely titillating. Jean Holloway, played by Watts, is a successful therapist with the kind of picture-perfect life it’s almost mandatory for characters to rebel against: she has an easygoing lawyer husband (Billy Crudup), a rambunctious daughter, and a beautiful home in Connecticut.

But beneath the surface, her quiet prosperity conceals a host of neuroses that begin to fester as she grows increasingly bored with her routine and begins to creep into her patients’ lives. Her sleuthing is most focused on Sidney, an ex-girlfriend who lives in a chichi suburb. It’s a little like In Treatment with more erotic intrigue, but it’s also a drowsy, unfocused lark that seems less necessary with every passing episode.

The cast—which includes Fifty Shades director Sam Taylor-Johnson as a thriller writer and TV veteran Scott Winant as Jean’s husband—works hard, but their performances are undermined by the incompetent writing. The pacing is logical but never suspenseful, and the characterizations are so muddled that even the most subtle hints are lost. It’s a shame that this fine cast was saddled with such a dull and predictable drama, but it’s just another example of streaming drift, where talented actors are stranded in a story that becomes less interesting with each passing hour. If you’re determined to watch it anyway, just be prepared for a long haul.

What You Need to Know About Dock Construction

Dock Construction is a massive project that can be complicated, so it’s essential to work with professionals. They can help you decide on the type and size of your dock, and get the necessary permits.

Dock Construction

Another option is to build seating into the dock’s design, which improves functionality and saves on costs. This is a popular trend that also makes it easier to maintain your dock.

Dry docks are structures that remove ships from the water and allow them to be inspected, repaired and maintained. Usually they are built on land, although floating dry docks are also available. The structure is essentially a large basin with a gate that closes when the ship is in place. It is important that a ship undergoes regular maintenance to keep it safe and seaworthy. A good dry dock will have a crew that is skilled at carrying out repairs and maintenance.

A common use for a dry dock is for the graving of ships, which involves cleaning and maintenance work that can’t be done in the water. This can include removing barnacles and rust, painting and repairing the hull. The dry dock is anchored on the ground with concrete blocks, and a heavy gate seals it once the ship is in position. The walls of the dry dock are reinforced with steel or concrete and are shaped to match the shape of a ship.

The keel block and bilge block are used to support the weight of the ship while it is in the dry dock. They must be positioned correctly to avoid damage to the hull. The block material must be selected according to the hull’s structural members. Different materials react differently with the loads placed on them. It is also important that the bilge block and keel block are positioned in accordance with the docking plan of the ship.

When the ship is positioned in the dry dock, it is essential that there is some water left in order to maneuver it. This helps to prevent damage to the hull while it is resting on the bilge or keel block. The bilge and keel blocks should also be positioned on the floor of the dry dock in a way that will not interfere with the navigation light beams or propellers.

During dry docking, the vessel is sailed or towed into the area, which has been closed off with a cofferdam and dewatered using the same methods as for constructing a concrete dock. The dry dock is then constructed of normal concrete construction, with piles to resist uplift pressure from the high seawater levels. The piles may be made from a combination of concrete and wood.

Wet dock

A wet dock is a structure that allows boats and ships to be moored in the water. It has a quay or basin, deck work and an enclosing wall of concrete. The enclosing wall can have gates that can be closed to prevent flooding during high tides or storms. The wet dock also includes a berthing space for smaller vessels, such as ferries and tugs.

The wet dock can be made of wood or concrete and is shaped in different ways. For example, it may be straight or curved and can be divided into multiple segments to increase the dock’s capacity. It also has wingwalls that can be used to assist in guiding the ship into its slip.

A wet dock’s entrance channel should be deep enough to accommodate large ships. The entrance channel should be dredged regularly to ensure it is clear of silt and sediment. It is also important to ensure that the entrance channel is well sheltered from winds and water currents, which can cause damage to the vessel.

Wet docks are usually located near ports. The docks are often used for the repair and maintenance of ships, but they can also be used for cargo loading or unloading. In addition, a wet dock can also be used as a floating bridge, or as a base for submarines and other military vessels.

Typically, wet docks are made of wood or metal. Those constructed of wood are typically painted with creosote, a preservative that protects the timber from attack by wood-boring insects. In the past, many terminals used creosote-treated wood for their pile-supported trestles and vehicle loading structures. However, these structures were often prone to corrosion, and the use of metal supports has since become common.

Commercially available floating docks are an option for people who want to enjoy their waterfront property without the expense of constructing their own dock. While they do not look as aesthetically pleasing as a custom dock, they are a good choice for many applications. In addition, they can be easily assembled and dismantled. Another advantage is that they require less maintenance than a traditional dock.

Piers

Piers are an essential component of dock construction and play a vital role in ensuring that the structure above is supported. They are designed to transfer the weight of a building or wharf to the soil or bedrock below, reducing the risk of structural damage. In addition, piers can be designed to withstand high loads and seismic activity, making them a good choice for structures in earthquake-prone areas. Piers are constructed using different materials, including concrete and steel. They can be either drilled or driven into the ground, depending on the type of soil and the load requirements.

Drilled piers are typically used for larger projects that require deep foundations, such as bridges or oil platforms. They are inserted into the ground and filled with concrete to create a strong base for the structure above. These piers are available in various lengths and diameters, which can be tailored to the project’s specifications. They can also be made with a hollow section to reduce the weight and cost of the structure.

Other types of piers are also available, including helical piles and push piers. Helical piles are a good option for projects that require a larger footing, such as wharves or marinas. These piers are built into the ground with a screw-like mechanism that is driven by a hydraulic power pack. They can be used for both dry and wet docks.

A pier can be constructed of wood or concrete, and it can include railings, lighting, and fenders to protect people from falling off the pier. Piers also need to be able to withstand lateral and horizontal forces, as well as corrosion from water. It is important to choose the right material for a pier construction, as different materials have their own advantages and disadvantages.

The most common material for a pier is concrete. This material is renowned for its durability and strength, which makes it an ideal choice for pier and wharf construction. It can withstand a variety of environmental pressures and is resistant to marine borer attacks and corrosion. It is also less expensive than steel, making it a cost-effective alternative to other pier construction materials.

Berthing space

Berthing space is the area where a ship is berthed while it is in a port. It is important to design a well-constructed berthing space to meet the needs of different types of ships and their cargo. In addition, berthing spaces should be able to withstand severe meteorological and hydrological conditions. In general, a berthing space should be well-sheltered and designed to block strong water currents. It should also be easy to access and equipped with suitable facilities for the vessel’s crew to carry out maintenance work.

A berthing space should be constructed in a way that it can handle large vessels and containers. This is essential to ensure the safety of passengers and workers. In order to achieve this, the berthing space should be free from obstacles and must be easily accessible by vehicles. It should also be equipped with a control room to monitor the movements of ships. In addition, the berthing space should be able to accommodate a variety of docking systems and equipment.

Depending on the size of the ship, the berthing space should be constructed from different materials. For example, it may be made of steel or concrete. The material used depends on the type of ship and its cargo. A well-constructed berthing space will provide adequate protection and security for both the ship and its cargo. The berthing space should also be able to accommodate various cranes, which are used to load and unload containers.

The berthing space should also be well-connected to the shipping channel. This is important because it will allow for the safe transfer of goods between the container ship and land. It should also be dredged regularly to keep the shipping channel clear of debris and sediments. In addition, the berthing space will need to be connected to an electrical power source and a pump-out station for fuel.

In addition to being dredged frequently, the berthing space should also be inspected for potential damage to the vessel’s bottom. Moreover, it should be able to handle a high number of ships on a busy day. The berthing space should also include an administration area, a parking lot, and a fueling dock.

Tips For Motorcycle Detailing

Motorcycles have a variety of upholstery, including coated leather and high-quality vinyl that feels like leather. These materials require special cleaners and protectants.

Motorcycle Detailing

Motorbikes also have chrome parts that should be polished to a shine. Keeping the bike clean not only improves its appearance but also makes mechanical problems easier to spot.

A motorcycle’s paint and chrome are highly exposed, so they can be especially vulnerable to oxidation and corrosion. This is why it’s important to wash and rinse them frequently. This will help the bike look better and also keep it safe to ride.

Start by rinsing the entire vehicle with a garden hose or even just a bucket of water. This gets off the large pieces of dirt, and it prevents them from scratching your paint when you wipe it down with a cloth or sponge.

During this step, you’ll want to pay special attention to the leading edges of your controls and other components that face forward. They’ll likely have more bugs and grime on them than other areas of the bike. It’s a good idea to rinse your brush or sponge out often, too, as you go. This helps avoid transferring dirt from the dirty parts of the bike to the clean ones.

The next step is to clean the bike using a mild soap, either a liquid bike-wash soap or a gentle dish washing detergent. Don’t use harsh household cleaners as they can strip the wax coating on your bike and cause damage to its paint. You’ll need to rinse the soap thoroughly, too, and you may want to use a second bucket of water for this purpose.

Once the bike is thoroughly cleaned, it’s time to dry it. The first thing you’ll need to do is remove the spark plugs and the oil filter. You’ll want to take special care around the battery and any electrical connections, as they’ll be very sensitive to water.

You’ll also want to cover the radiator, as any acid that gets into it can damage the paint and the metal. Finally, you’ll need to reinstall the side covers, saddlebags and any other bodywork that was removed during the cleaning process.

Degrease

Even if you have taken the time to wash your motorcycle with soap and water, there is still likely dirt and grime that has bonded to the surface of the paint. This is why it is important to degrease your bike after you wash it.

Using the degreaser that is recommended for your motorcycle, spray it liberally over the areas with a bad buildup of grease and oil. Give the degreaser a few minutes to work and then use your scrub brush and a little elbow grease to get those hard-to-reach areas. When you are done, rinse and dry thoroughly with a microfiber towel.

After you have rinsed and dried your motorcycle, it is a good idea to protect its rubber components with a high quality rubber protectant to help keep the sun from damaging them. This is particularly true on the seat and any other areas where the bike will be parked outdoors, like the fenders. A motorcycle cleaner with built in UV protection will help to keep the rubber components in good condition.

It is a good idea to use a cleaner that also provides UV protection for the dash of your motorcycle as well. Keeping this area clean will not only make your motorcycle look better, but it will also help to prevent the cracking and discoloration that can occur over time.

One of the biggest advantages of detailing your motorcycle regularly is that it can help to increase its resale value. Potential buyers will be more likely to pay top dollar for a clean, shiny motorcycle that is in good working condition.

Taking the time to clean your motorcycle can make it easier and more fun to ride. Plus, it will help to protect your investment and extend the life of your motorcycle. So if you haven’t done so lately, take the time to wash your motorcycle and degrease it, then polish it up and protect it with a coat of protective wax. It will be well worth the effort.

Polish

The paintwork of a motorcycle is more fragile than that of a car. That’s one of the reasons it’s so important to polish it often – it protects it and keeps it looking its best. The other reason is that bikes tend to have more intricate metal parts than cars – and they need special attention to make sure they shine.

When polishing the painted surfaces, be careful not to get too close to the edges and curves of the body. It’s also a good idea to work in the shade if possible, as bright sunlight can cause the polish to dry too quickly and leave water spots.

Once the polished areas are smooth and glossy, you can move on to the chrome and other non-painted surfaces. For chrome, it’s important to use a product designed for the type of metal that it is (not all chrome products are created equal). The same goes for other non-painted finishes on the bike – using a product made for plastic or rubber will help you avoid dulling them. If you have leather seats or handlebars, it’s a good idea to use a conditioner or reviver to keep them soft and flexible.

After you’ve buffed the chrome and other non-painted areas, apply a coat of wax to help protect your hard work. Waxing your bike will also give it a deeper, more reflective shine that will look like it just came out of the showroom.

Be careful when applying the wax – it’s a good idea to buff it with small circular motions and moderate pressure. Don’t forget to wipe away any excess wax that finds its way into the crevices or around the emblems – this can dry out and damage them. Once the wax is buffed to a haze, your motorcycle will have a shiny, showroom-quality finish that will last. And it’ll feel and ride better, too! It’s well worth the effort.

Clean the Chain

The chain is the grimiest part of a motorcycle, and it’s essential to start the detailing process by cleaning it. Many professional detailers use a special bike-chain cleaner, but you can use the same products that you would for your car engine (but never spray the chain directly with a pressure washer, as this can loosen the components of the chain).

If you don’t clean your chain, it will quickly wear out and need replacement, and it may even affect your riding experience by creating a rattle or buzzing sound from the loose, misaligned chain. You should also scrub the sprockets to remove any dirt that’s accumulated, and a toothbrush or chain-specific brush works well for this.

Some motorcyclists skip this step, but lubricating the chain is an important part of detailing and helps your motorcycle perform at its best. If the chain isn’t lubricated, it will wear out three to four times faster than one that is properly oiled.

A lubricated chain will also improve the efficiency of your motorcycle, as it won’t have to work so hard to transmit power. This will give your ride a smoother, more consistent feel, and it will also reduce the amount of wear on the rear sprockets.

After you’ve scrubbed your chain and sprockets with a toothbrush or a chain-specific brush, put the motorcycle on its center stand or paddock / chain lube stand. Then move the rear wheel by hand slowly to see if the chain is smooth and free-moving at all times. If it’s tight at some spots, you need to clean and re-lube the chain.

Once your bike is clean and lubed, it’s ready to shine. Whether you’re heading out to the next bike night or looking to sell it, a meticulously detailed bike will get more attention and draw a higher price than an unsightly, grimy one. Remember that it takes time and patience to do a good job, but the rewards are worth it!